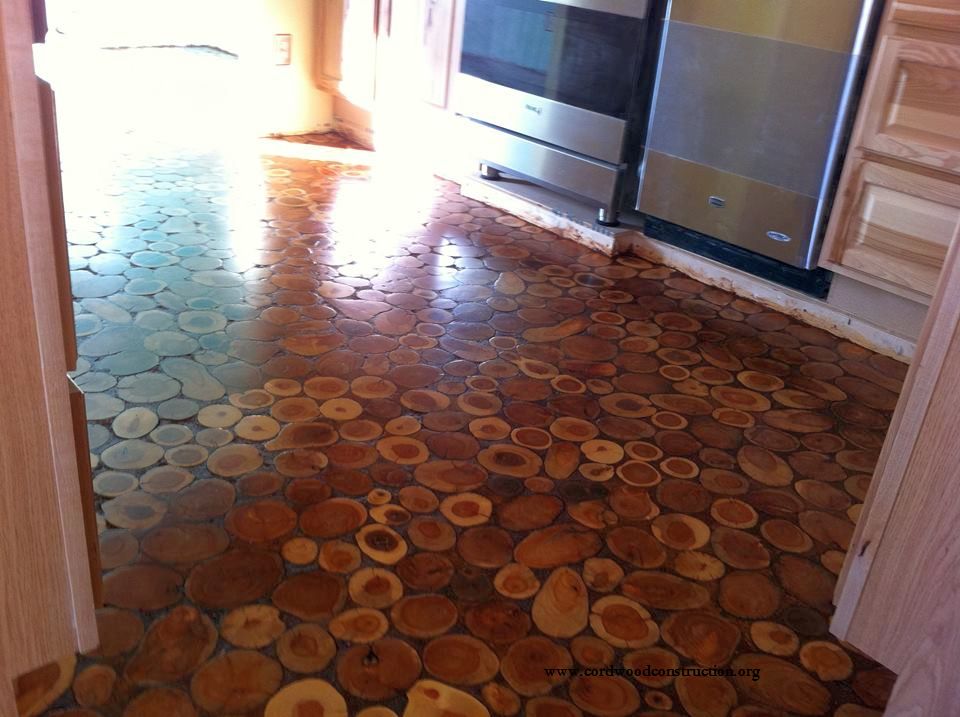
A cordwood floor is one of the most elegant styles you can do in your home for a super economical price. Albeit time consuming, it’s definitely a doable project – and I personally find it more appealing than penny floors (although, those are gorgeous as well).
Sunny Pettis Lutz and her husband, Tony, sent photos of their cordwood floor and process to Cordwood Construction. The results are absolutely stunning. The biggest challenge is finding a substantial supply of dead trees. If you don't have any, seek out a wood-harvesting permit from your local forest service to harvest wood from.
The process is relatively simple. Cut logs into suitable 1” discs with a chop saw. Then, remove the bark from the discs with a scraper. It’s important to sort the good discs from the broken and shattered ones so you get an even and aesthetically pleasing floor. Then, use a belt sander to sand both sides of the wood discs—as they will be glued on to secure them in place.
After you prep the cordwood, then it’s time to get the floor in shape. Sunny swept and prepared their floor by mopping it to make sure it’s clean— a concrete slab to adhere the discs to with glue. After prepping the floor, begin placing the wooden discs in a systematic manner, trying to put them as close as they can be. Once you get the layout you like, glue the bottoms and stick ‘em to your floor—Sunny uses Loctite PL premium Construction Adhesive. Continue doing this process until the entire room is complete with the wooden discs.
Using a belt sander, smooth out the floor until it is level. Before grouting and applying polyurethane, make sure to use a shop vac to suck up any dust. Once your floor is clean from dust debris, apply a thin layer of polyurethane on the discs’ surfaces to prevent grout from discoloring the wood. Next, prep a tile grout and sawdust mixture, and apply it in between the spaces of the discs. Clean off your surface, and apply about three more layers of polyurethane into the entire room to complete the flooring.
For more information, visit the link below:
Read MorePhoto by: Sunny Pettis Lutz


